
Microsoft Loop cheat sheet
Announced in 2021, Microsoft Loop was officially rolled out to business customers in November 2023 and to individual users in June 2024. The new tool includes both text snippets that can be embedded in certain Microsoft 365 apps and a standalone app where employees can collaborate in shared workspaces.
It’s a little hard to wrap your head around how Loop works, but it’s well worth the effort for businesses that use Microsoft 365.
Here’s how you can use Loop to collaborate with your team.
In this article:
- What is Microsoft Loop?
- What are the main elements in Loop, and how do they work together?
- What are the key benefits of Microsoft Loop?
- Who can use Microsoft Loop?
- How to use Microsoft Loop
- Creating a Loop workspace
- Creating Loop pages
- Using Copilot in Loop
- Sharing a Loop workspace or page
- Managing your Loop workspaces and pages
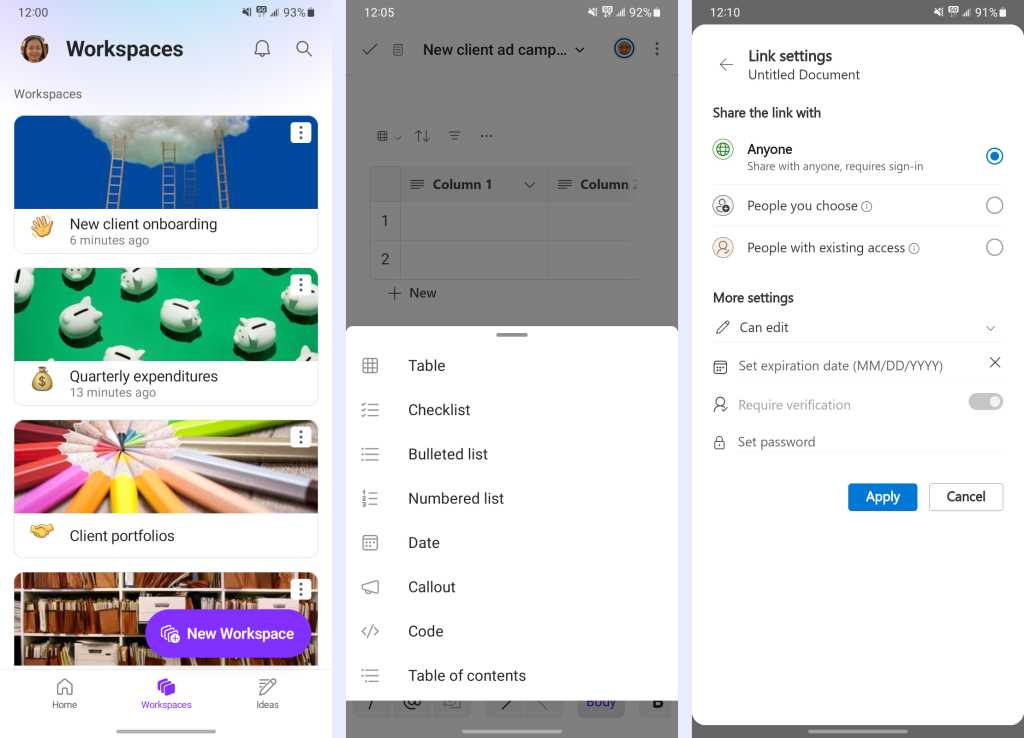
- Using the Loop mobile app
What is Microsoft Loop?
Microsoft Loop is a productivity app that lets Microsoft 365 users work together in shared spaces where they can collect documents and other materials, do simple project planning and task management, brainstorm ideas with co-workers, and more.
Certain elements of Loop, called Loop components, can also be embedded in Microsoft 365 apps that include OneNote, Outlook, Teams, Whiteboard, and Word (web version).
You use Microsoft Loop through your web browser; it’s also available as an app for Android or iOS, with more limited functionality.
What are the elements in Loop, and how do they work together?
Microsoft Loop consists of three main elements: Loop components, Loop pages, and Loop workspaces.
Loop components are shared cards that can contain lists, paragraphs, tables, or other text formats. In addition to collaborating on components in the Loop app, you can embed them in Microsoft 365 apps such as Outlook or Teams. Any changes made to a Loop component in one location immediately appear in all other locations. That way everyone always has the most current version of the component no matter which app they’re working in.
Loop pages are shared digital canvases that let you add Loop components and other elements such as text, images, and related information. Your colleagues can collaborate with you on pages that you’ve shared with them, and all changes are synced in real time.
Loop workspaces are virtual spaces where you can group together related pages. You can share a workspace with co-workers and guests so that they can collaborate with you on the pages it contains.
These three elements work in tandem for highly effective collaboration. For instance, you could create a workspace for a project your team is working on. This project workspace could include multiple pages related to the project — meeting notes, issue tracker, project brief, project planning page, and so on.
Each page could include one or more Loop components that in turn could be embedded into Outlook emails, Teams conversations, and other Microsoft 365 apps. When a component is updated in any of these places (including the Loop app), it is updated in real time everywhere else it appears.
What are the key benefits of Microsoft Loop?
- Easier and more efficient team collaboration
- Centralized management for documents and other materials
- Information stays in sync across multiple Microsoft 365 apps
- Reduces lost time and focus caused by frequent app-switching
Who can use Microsoft Loop?
Loop is included with all Microsoft 365/Office 365 business and education subscriptions. This includes the Loop app as well as Loop components embedded in other Microsoft 365 apps. Most Loop features are available to all users with work or school accounts, but those with only Office 365 plans will need to purchase an additional plan to be able to create new Loop workspaces or to add or remove members from them.
Until recently, Loop for business users was limited to internal collaboration, but you can now share Loop components, pages, and workspaces with people outside your organization, with some limitations. See Microsoft’s blog post for details.
Note that if you have a work or school Microsoft account, your administrator will need to enable the Loop app for your organization before you can use it.
For now, the Loop app is available for free to individuals with Microsoft 365 subscriptions or free Microsoft accounts, but you can’t embed Loop components in other M365 apps. Also note that for individuals, Loop workspaces and pages count toward your Microsoft storage quota.
How to use Microsoft Loop
We have a separate story that goes into detail about Loop components and how to use them in Microsoft 365 apps. In this story we’ll focus on setting up pages and workspaces in the Loop app. Here are the basic steps for using the app:
- Create a workspace.
- Add one or more pages to your workspace.
- Add text and other elements, including Loop components, to a page.
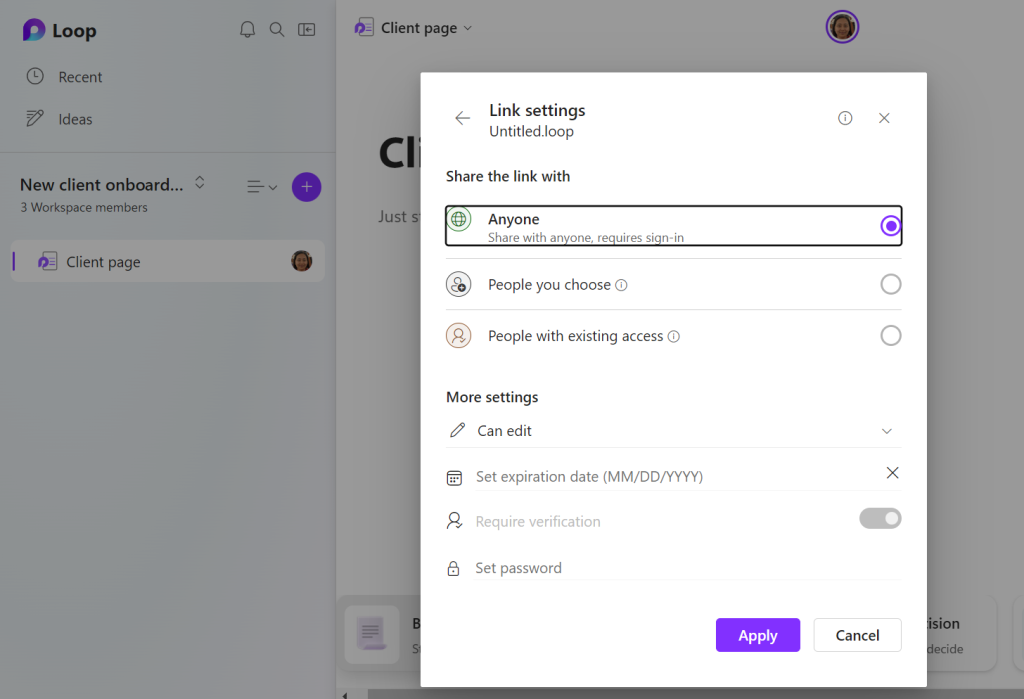
- Share a page or workspace with colleagues so they can collaborate with you on it.
Keep reading for detailed instructions for each step.
Creating a Loop workspace
From the home page of the Loop web app, click the + button at the upper right. On the “Create a new workspace” panel that opens, type in a name for your new workspace.
Starting a new Loop workspace.
Howard Wen / IDG
To change the cover image for the workspace, click it and select another from the gallery of images and gradient colors that opens. You also can select an icon for your workspace by clicking the smiley face button to the left of the workspace title entry box.
If you have an individual Microsoft account or Microsoft 365 plan, click Create and your workspace will be created. (You can skip to the next section of the story, “Creating Loop pages.”)
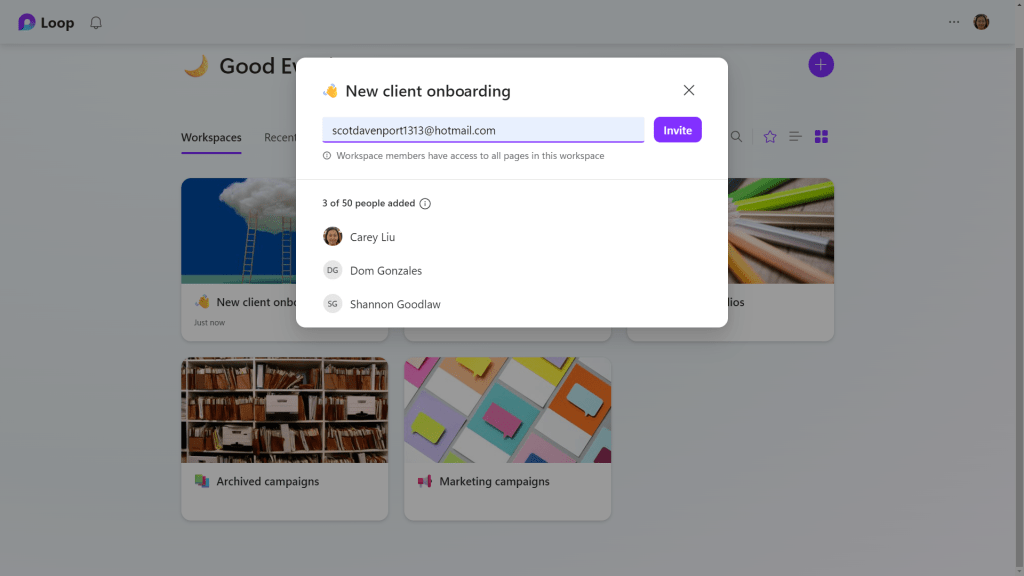
If you have a Microsoft 365 business account, the “Create a new workspace” panel also includes a “Share your space” area where you can invite members to this workspace by typing in email addresses or names of people in your contacts. Or you can skip this step for now and invite people later.
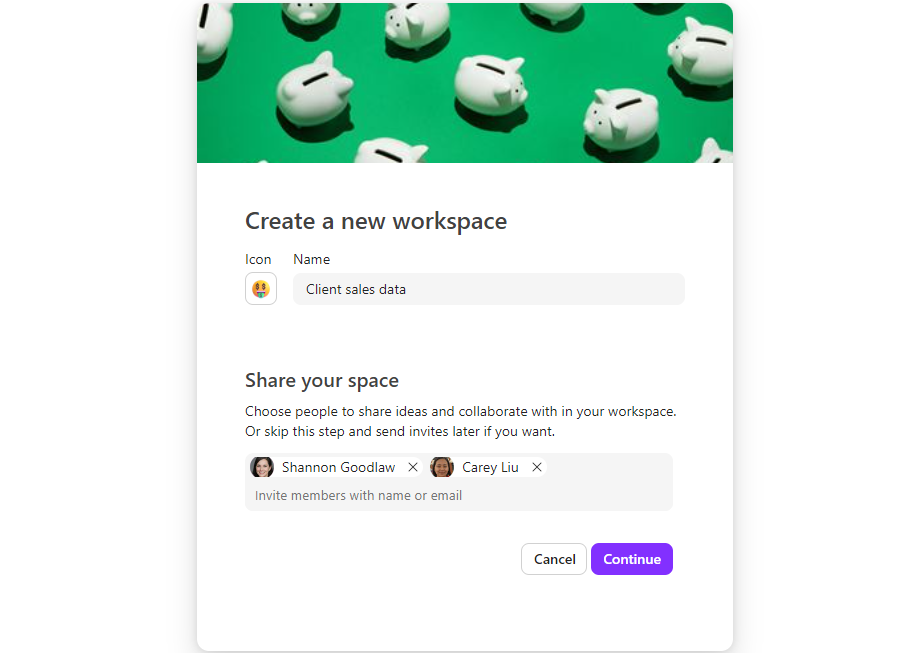
Name, customize, and invite members to your new space.
Howard Wen / IDG
Next, click Continue. The “Add files to your workspace” screen appears. Type one or more words about your workspace into the area on the left, and Loop will list shared company files and Loop pages that might be relevant on the right.
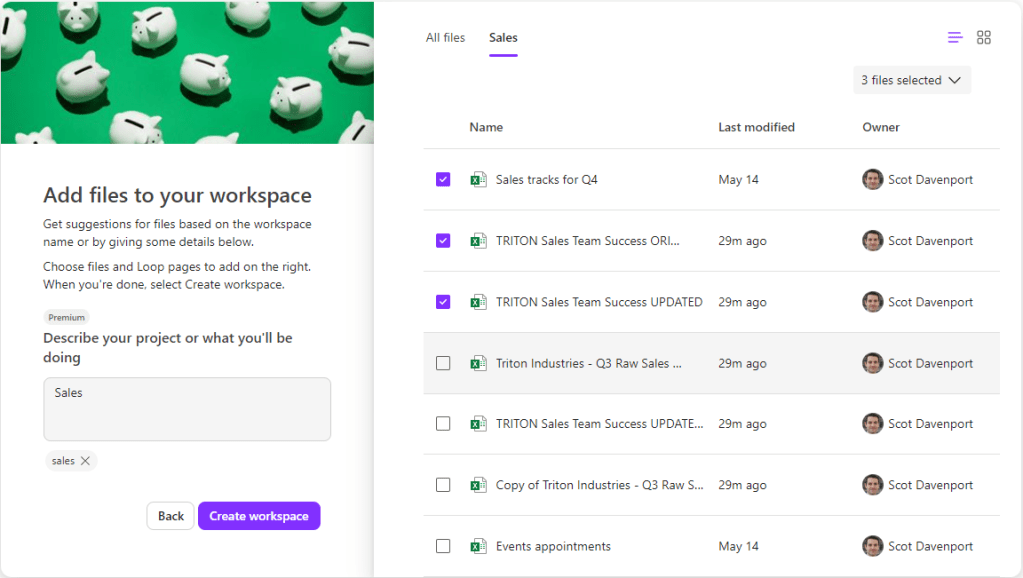
Type in a word or brief description of your workspace, and Loop will suggest files to include with the space.

Type in a word or brief description of your workspace, and Loop will suggest files to include with the space.
Howard Wen / IDG

Type in a word or brief description of your workspace, and Loop will suggest files to include with the space.
Howard Wen / IDG
aria-hidden=”true”>
Howard Wen / IDG
Select the files and pages you want to include and click the Create workspace button. Your workspace will be created with the selected files and pages attached.
Creating Loop pages
After you create your workspace, you’re taken to its first page. Type in a name for this page. If you like, you can assign the page an icon and cover image: click Add icon and Add cover and select from the options that appear.
Creating a new page in a workspace.
Creating a new page in a workspace.
Howard Wen / IDG
Creating a new page in a workspace.
Howard Wen / IDG
aria-hidden=”true”>
Howard Wen / IDG
Add text and other elements: In the “Just start typing…” area, type text or / to see a list of elements you can add to your new page, such as checklists, headings, images, progress trackers, tables, and more. (See “How to use Microsoft Loop in Outlook and Teams” to learn about the Loop elements you can add to a page.) To tag a colleague: type @ and start typing their name, then select their name when it appears.

Type / to see a list of elements you can add to a page.
Type / to see a list of elements you can add to a page.
Howard Wen / IDG
Type / to see a list of elements you can add to a page.
Howard Wen / IDG
aria-hidden=”true”>
Howard Wen / IDG
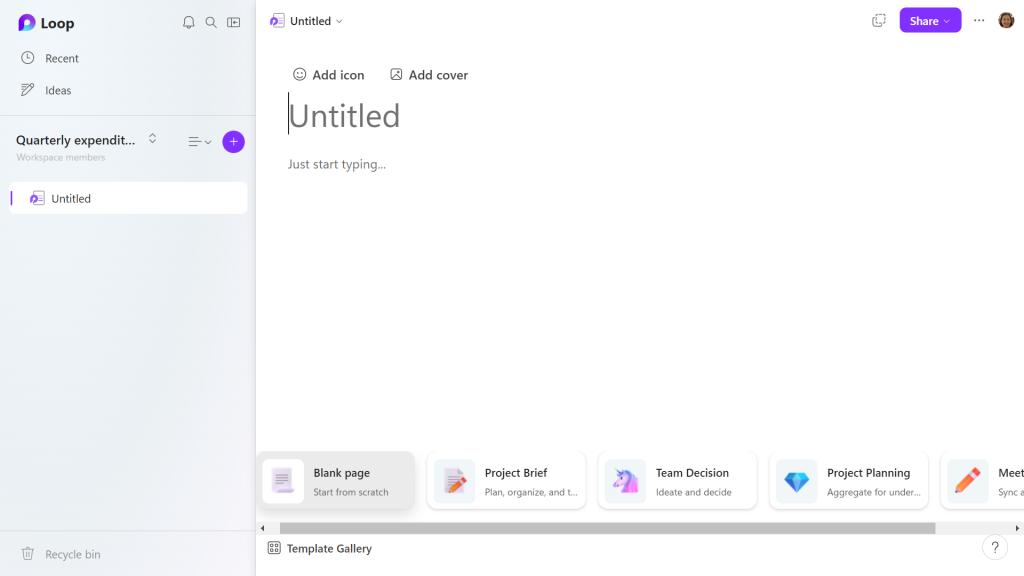
Use a template: Along the bottom of a new page are thumbnails for templates such as Project Brief, Team Decision, Meeting Notes, and so on. You can select a template to apply a pre-designed layout to your new page, then customize the page as you like. Click Explore other templates to open a gallery of layouts.
Turn an element into a Loop component: You can select any element on your page to turn it into a Loop component that can then be embedded in other Microsoft 365 apps.
Click the element to select it, then click the six-dot icon that appears to the left or upper left of the element. On the menu that opens, select Create Loop component.
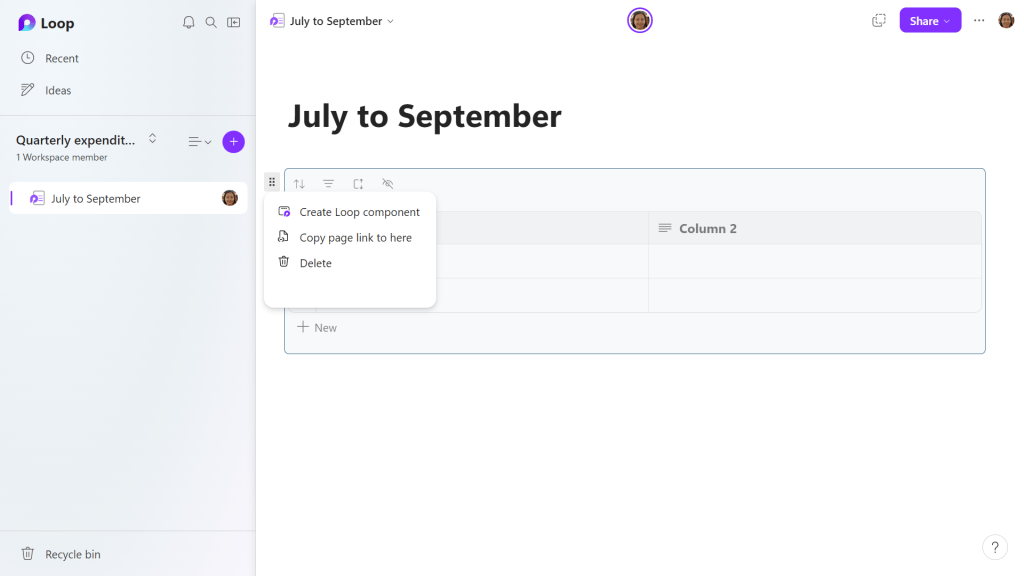
Turning a page element into a Loop component.
Turning a page element into a Loop component.
Howard Wen / IDG
Turning a page element into a Loop component.
Howard Wen / IDG
aria-hidden=”true”>
Howard Wen / IDG
The element will now have a border around it with the Loop logo at its upper left. To share this element as a Loop component in another app, select the Copy component icon (two overlapping squares) at the upper right of the element border.
You can then paste the Loop component link into another Microsoft 365 app, such as a OneNote note, Outlook email, Teams channel or chat, Microsoft Whiteboard canvas, or Word (web version) document.
Note: If you have a Copilot for Microsoft 365 subscription, you have several more options for creating and collaborating on content in your Loop pages.
Adding more pages and subpages
Add another page: In the left sidebar, click the circular + button. On the menu that opens, select New page.
Add a subpage: You can add a page that is branched below another page. In the left sidebar, move the pointer over the page and click the three-dot icon. On the menu that opens, select New subpage. Note that you can also add a subpage below a subpage.
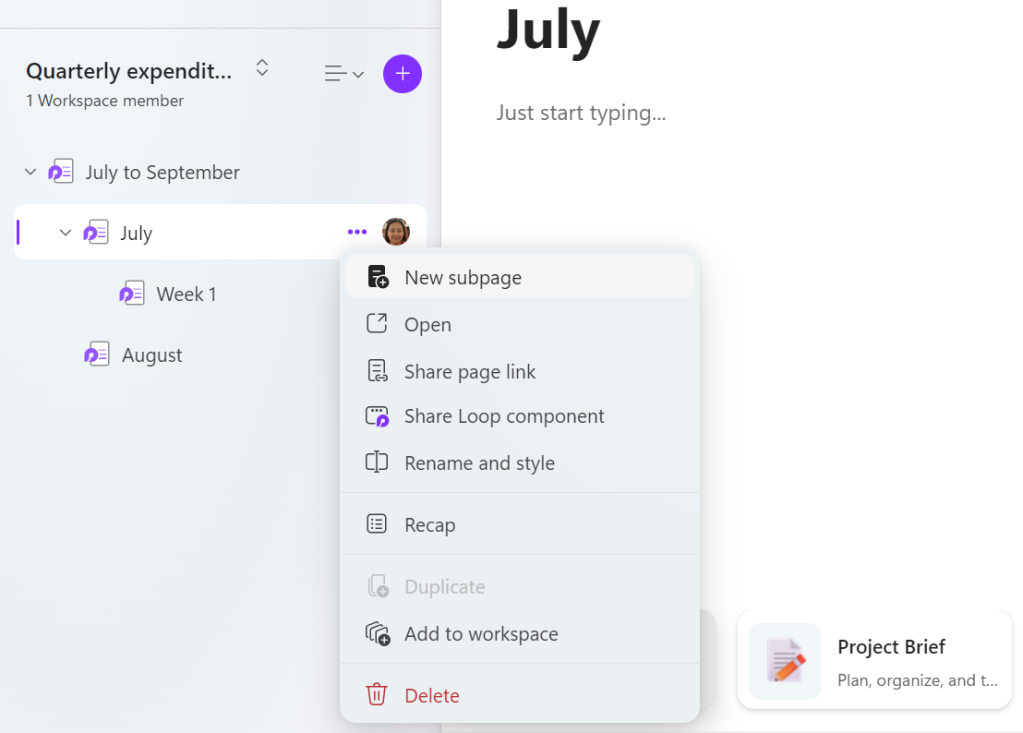
You can add subpages (and sub-subpages) as needed.
Howard Wen / IDG
Creating pages in the Ideas section
Toward the top of the left sidebar, there’s a section titled “Ideas” where you can create and work on pages before you add them to a workspace. For instance: You may want to spend extra time perfecting a page before you add it to a workspace that you’ve already shared with co-workers or clients.
Create a page in Ideas: Move the pointer over Ideas in the sidebar and click the + that appears to its right.
Creating a page in Ideas.
Howard Wen / IDG
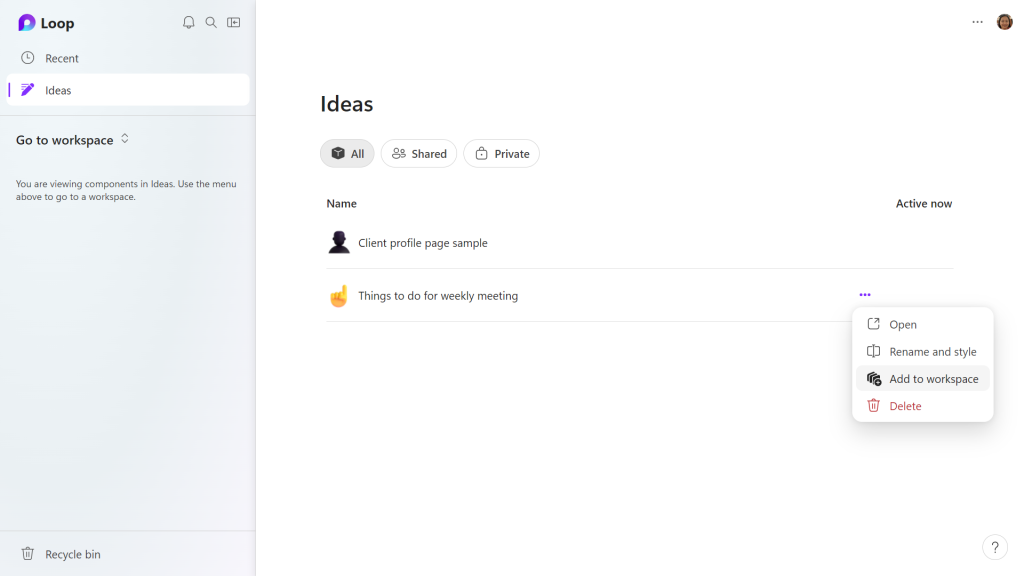
Add a page in the Ideas section to a workspace: Click Ideas in the left sidebar. A list of pages in the Ideas section opens in the main window. Move the pointer over a page and click the three-dot icon. On the menu that opens, select Add to workspace.
On the panel that opens, click the name of the workspace. The page will be appended as the last page in that workspace. Alternatively, you can select New and create a new workspace where the page will be placed.
Adding an Ideas page to a workspace.
Adding an Ideas page to a workspace.
Howard Wen / IDG
Adding an Ideas page to a workspace.
Howard Wen / IDG
aria-hidden=”true”>
Howard Wen / IDG
Restoring an older version of a page
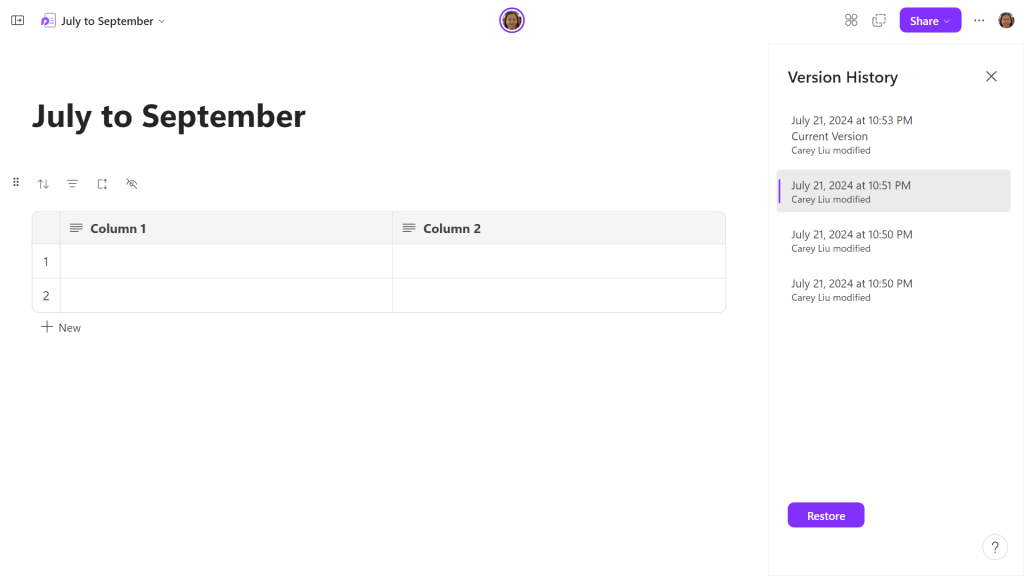
The Loop web app archives previous versions of a page as you and your collaborators make changes to it. You can view these and restore one to your workspace.
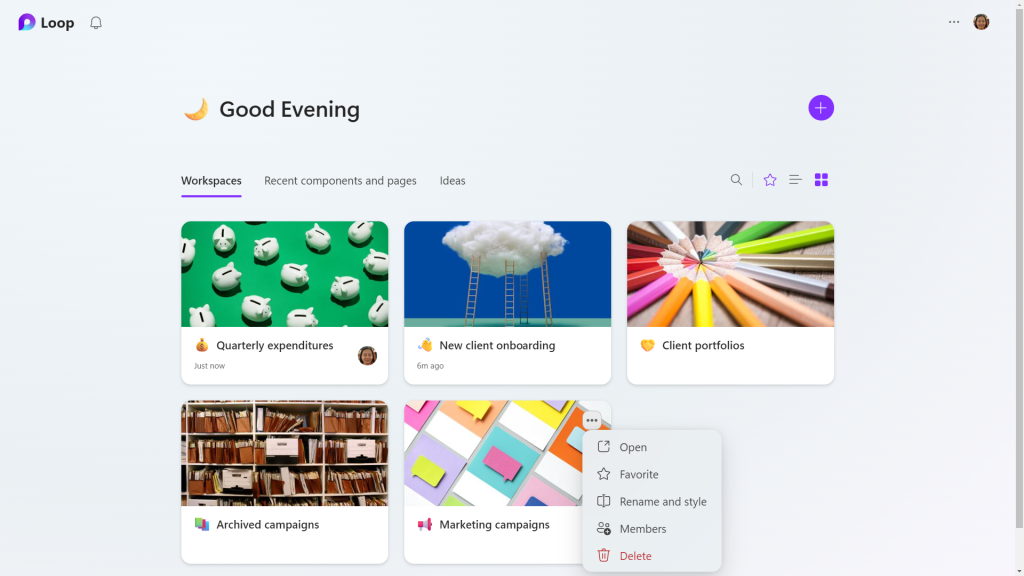
With the page open, click the three-dot icon at the upper right. On the menu that opens, select Version History. In the right sidebar, click the date/time of a previous version. That version will appear in the main window. Click the Restore button to replace the page with this previous version.
You can view and restore earlier versions of a page.
You can view and restore earlier versions of a page.
Howard Wen / IDG
You can view and restore earlier versions of a page.
Howard Wen / IDG
aria-hidden=”true”>
Howard Wen / IDG